Welcome to Moda Fabrics!
Christmas Stars...
Christmas Stars...
Published:
Jul 13 2018 - 05:00
I fell in love with these little stars the first time I saw them on Pinterest.

They're called Scandinavian Stars or Scandi Stars, and they're most often used as Christmas tree ornaments and gift tie-ons. The origin suggests that they were originally made with paper.
Since I had some scraps left from cutting the capsets for Zen Chic's White Christmas Metallic, that's what I used to make these. Though once I got started, I also had to cut up some Christmas Figs by Fig Tree & Co.. (Both collections are in shops now.)
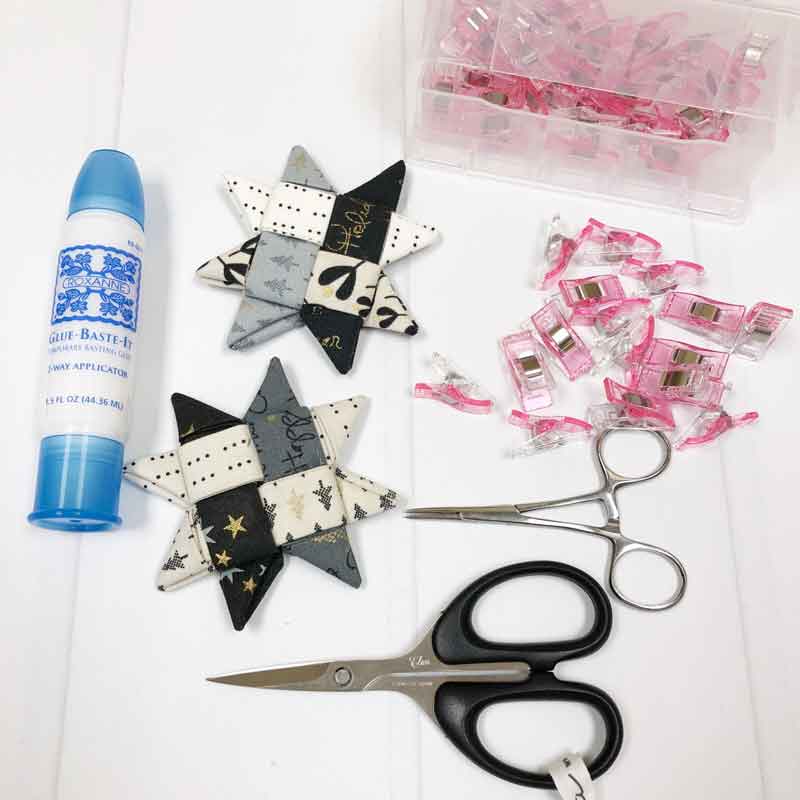
Here's what you'll need to get started:
- 4 strips of fabric - 3" x 14".
- an iron to press the strips
- Wonder clips or other regular-sized binding clips
- a hemostat or tweezers. A few folks like a bodkin but the hemostat worked best for me - and I found the smaller size was easier to use.
- very sharp scissors that cut at the tip - small is better - I like these 5" embroidery scissors by Elan
- Baste-it Glue - optional but recommended.
- Perle cotton or embroidery floss to add a tie-on or loop - optional.
Here's how it's done.
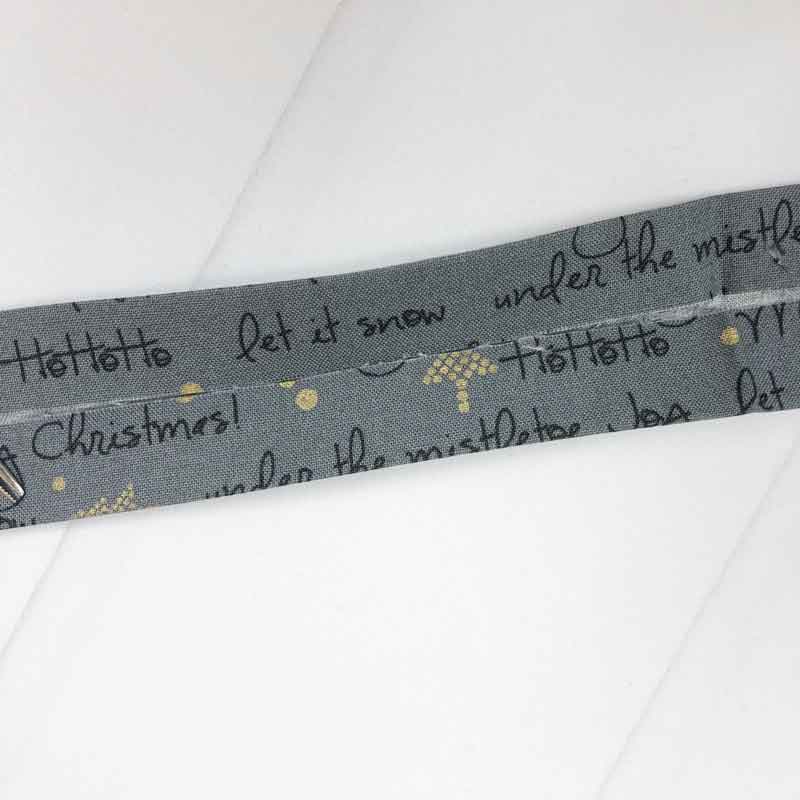
Press all four strips in half lengthwise - so that it measures 1-1/2" x 14". Then turn the edges to the center so that the strip resembles double-fold binding. Press it well.

There are now four strips that measure approx. 3/4" wide x 14" long.
Fold the strips in half and press lightly. Some folks suggest a bit less than half so that one strip is longer than the other but I found it didn't make any difference - I still had more than enough length.
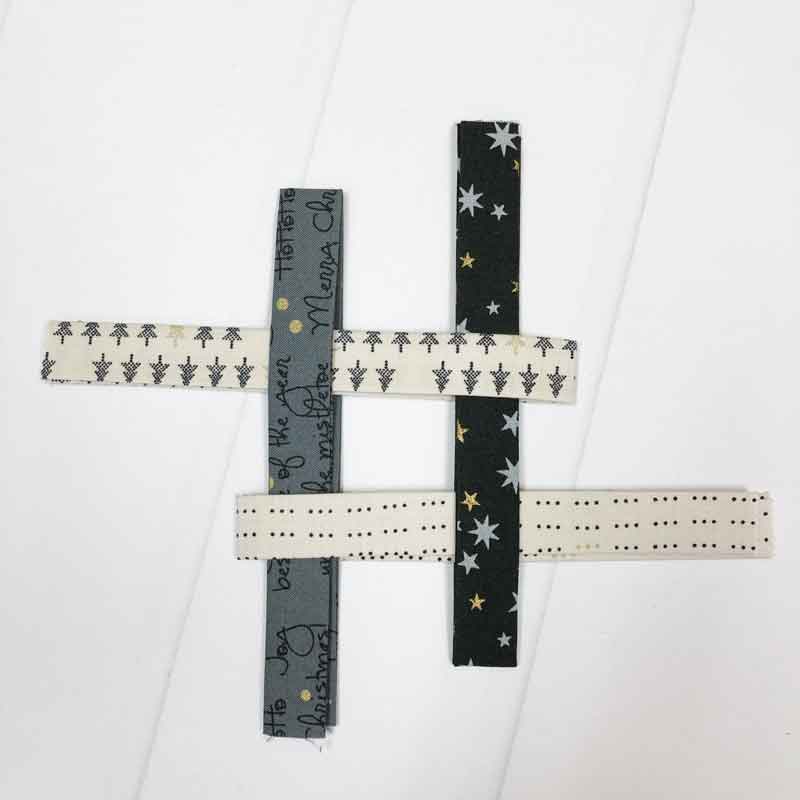
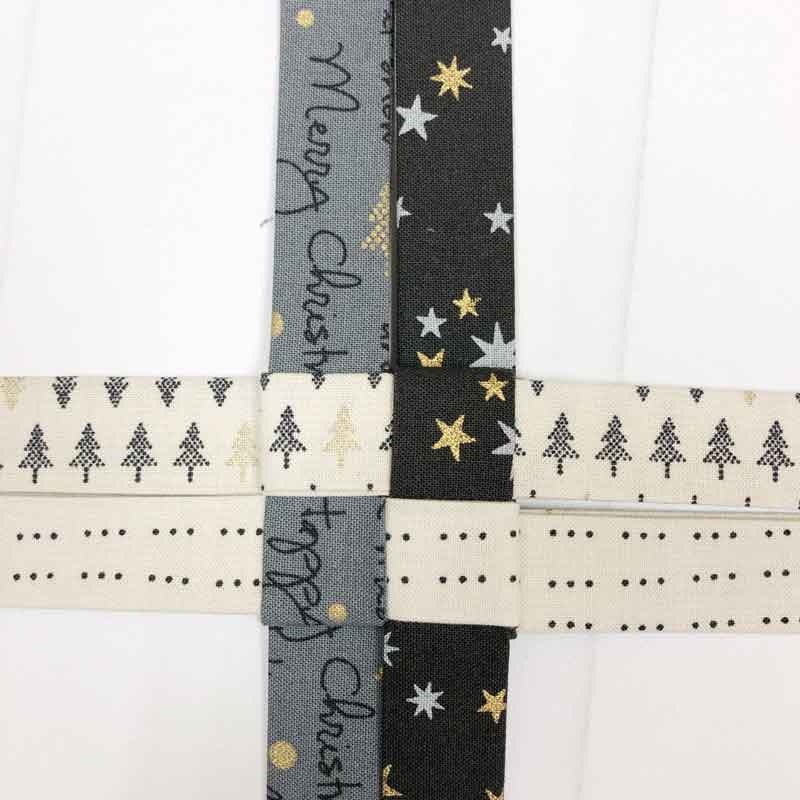
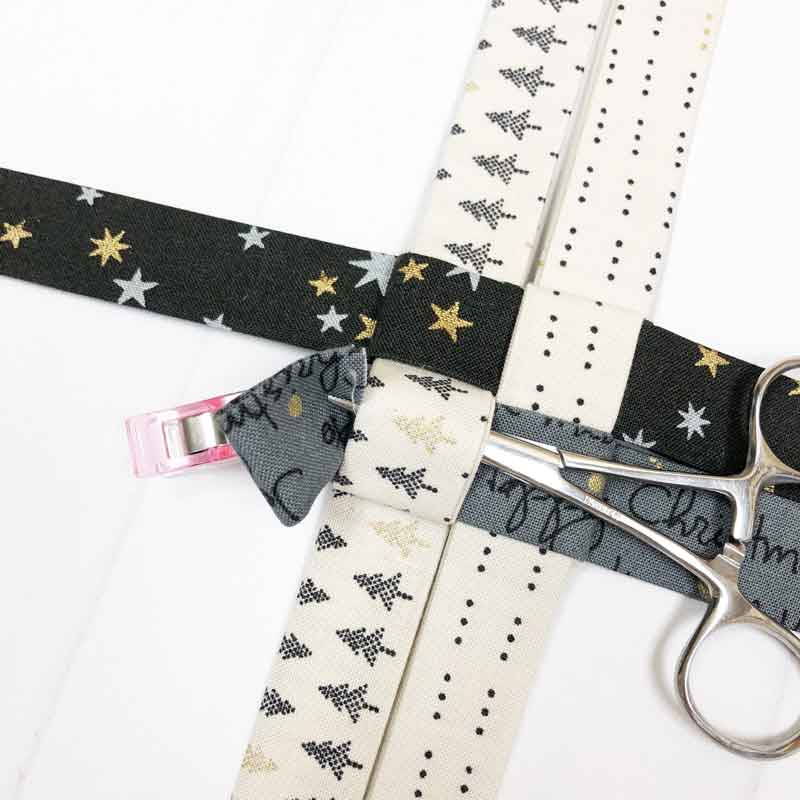
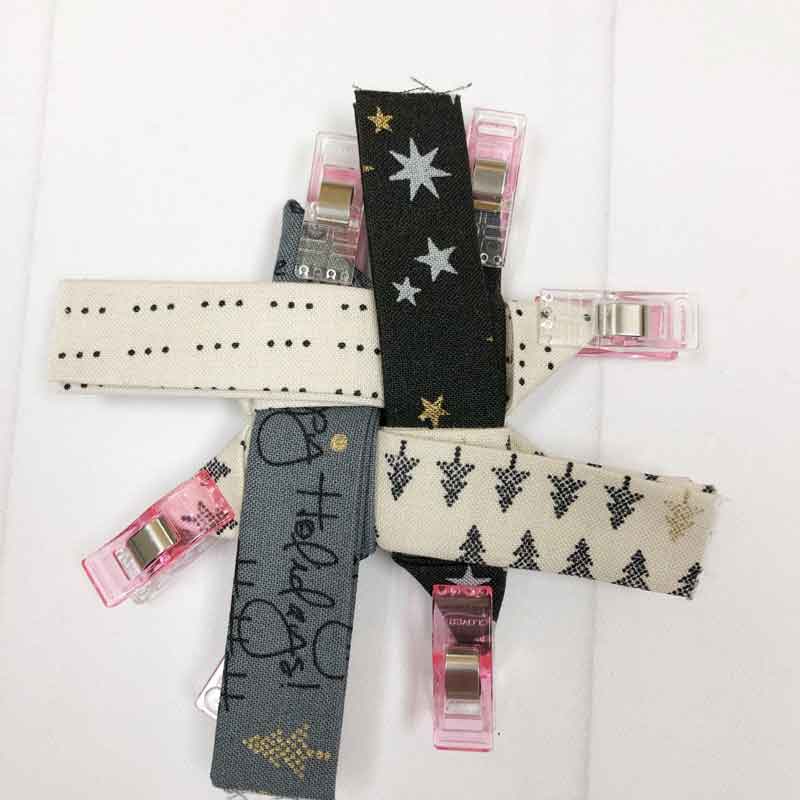
Weave the four strips like so. While I don't think it matters, I positioned the strips so that the fold was on the inside edge - toward the center.
The key here is to make sure that the four strips are going in different directions. If it helps, this is the step that took me the longest to get right on successive stars.
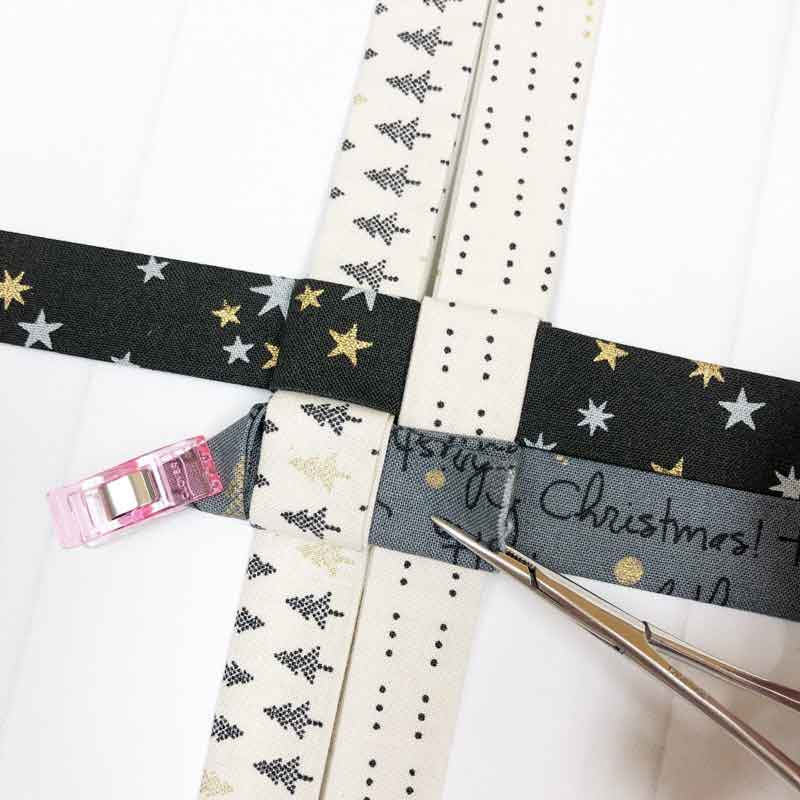
Move the strips so that they are somewhat tightly woven - but without any pulls or puckering. Pulling gently on the strips will help get this tight-close enough.

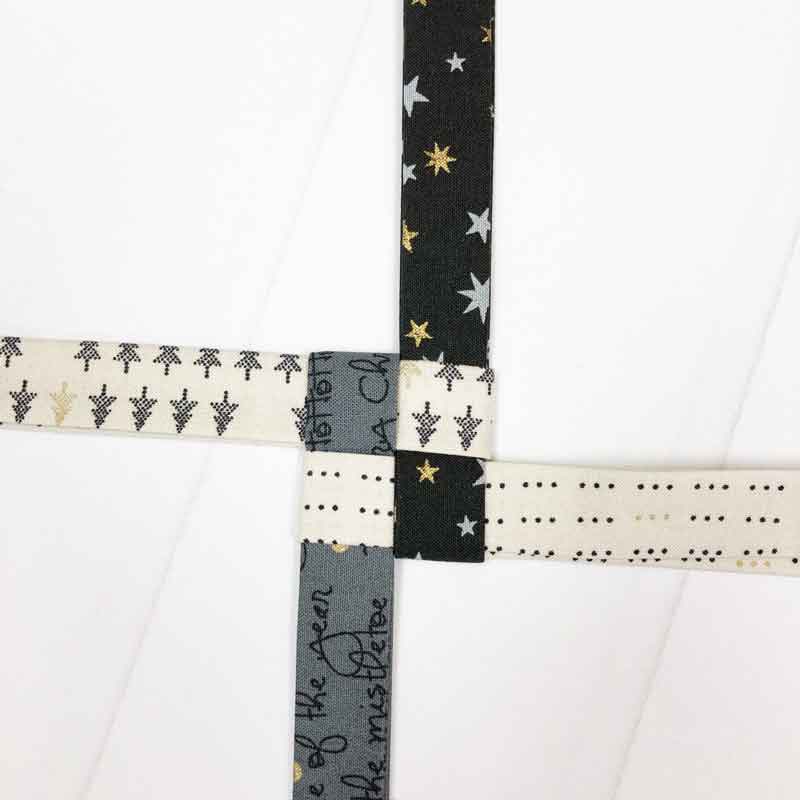
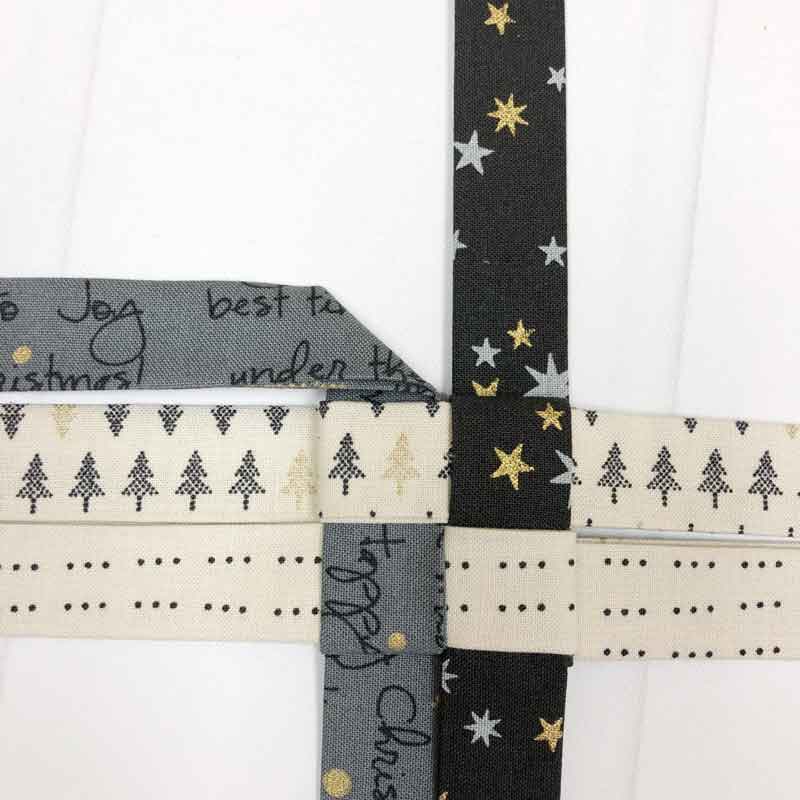
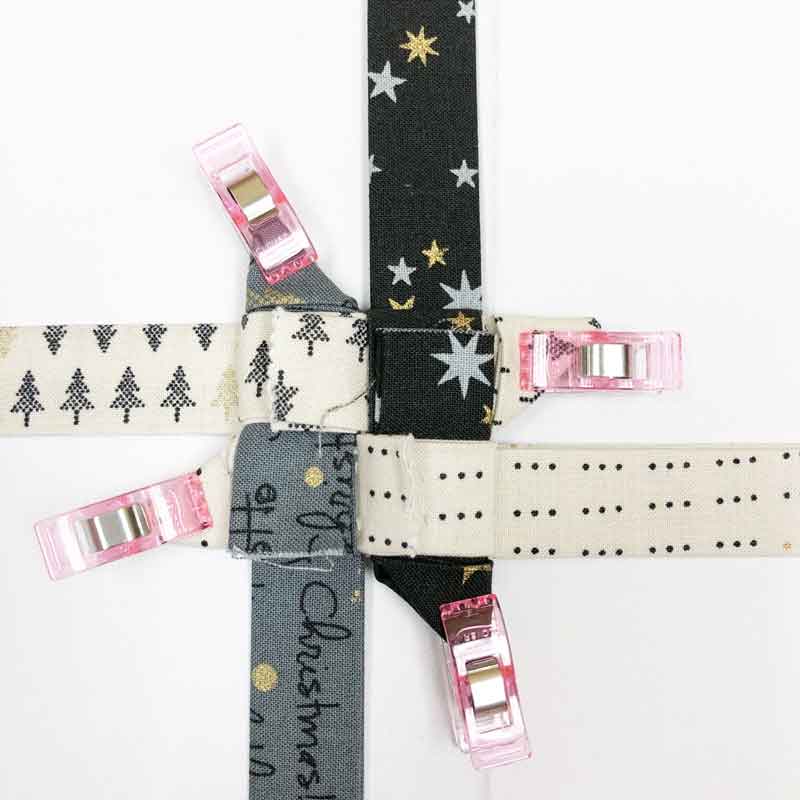
Starting on one side, fold each strip over going in a clockwise direction. Don't worry about pulling them tight yet.

The fourth strip will be woven under the first folded strip - this is where the hemostat or tweezers help.
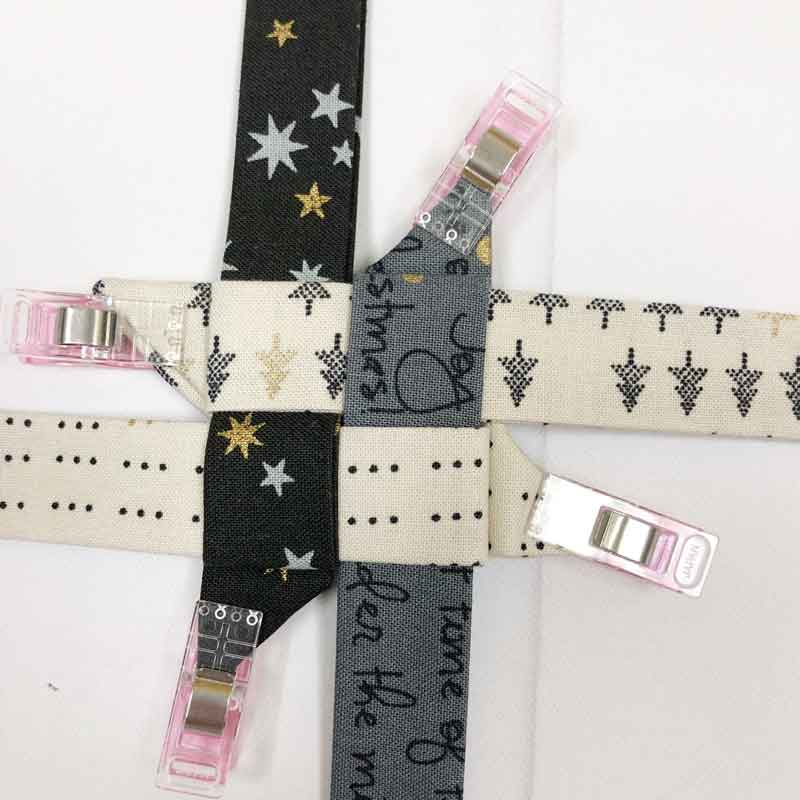
Pull the strip close, then tighten up the three remaining strips so that the center is still nestled together.
Starting with one strip, fold the strip at a 45-degree angle as shown.
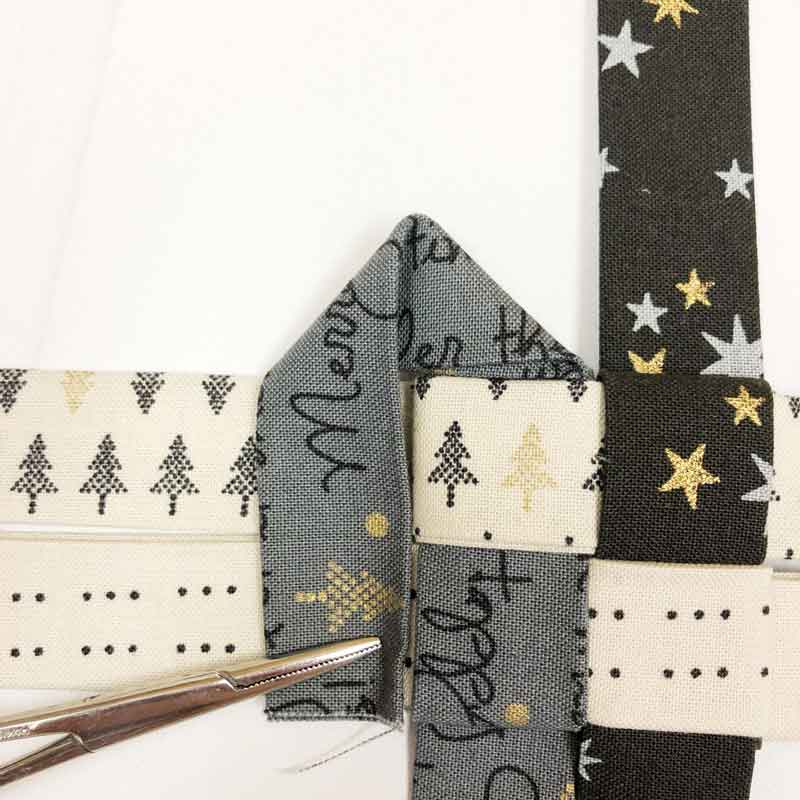
Now fold it down another 45-degrees to make a point as shown. (The hemostat is there just so I can take the picture.)

Fold the triangle back on itself to form a point as shown.
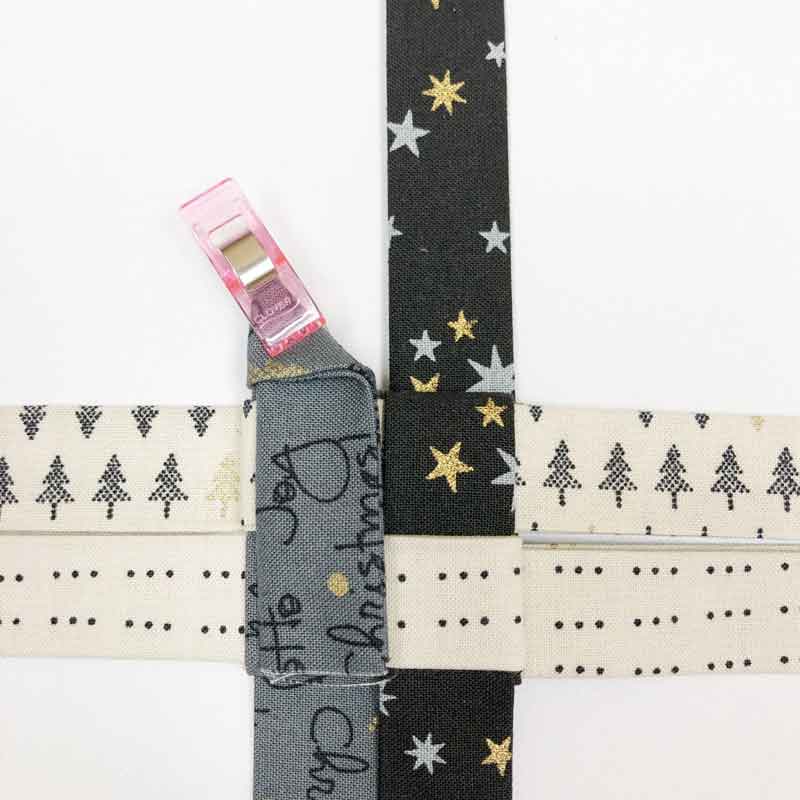
Secure with a binding clip.
Use the hemostat or tweezers to pull the tail of the triangle under the strip beneath it as shown. Don't worry if that strip loosens a bit, it can be tightened after the tail is threaded under.
After pulling the tail completely through, straighten, tighten and smooth as necessary.
Repeat on the three remaining strips.
Turn over the star and repeat the 45-degree folding on the four remaining strips.
Eight binding clips and some longer tails - the reason why some folks fold the strips unevenly.
This is also a good time to note that the strips I was working with were only 13" long - that was the length-width of the scrap pieces I had. As you can see, I have more than enough length on both sides... enough that I bet I could have cut the strips 3-1/2" wide for a slightly bigger star.
Now it's back to the iron. Working on one side at a time, remove two clips and press the points flat. (A bit of steam won't hurt.) When all four sides have been pressed, I pressed the entire star - and I gave it a lovely shot of steam to set it nicely.
Starch? I experimented with that on one star and I don't think it helped enough to do it again.
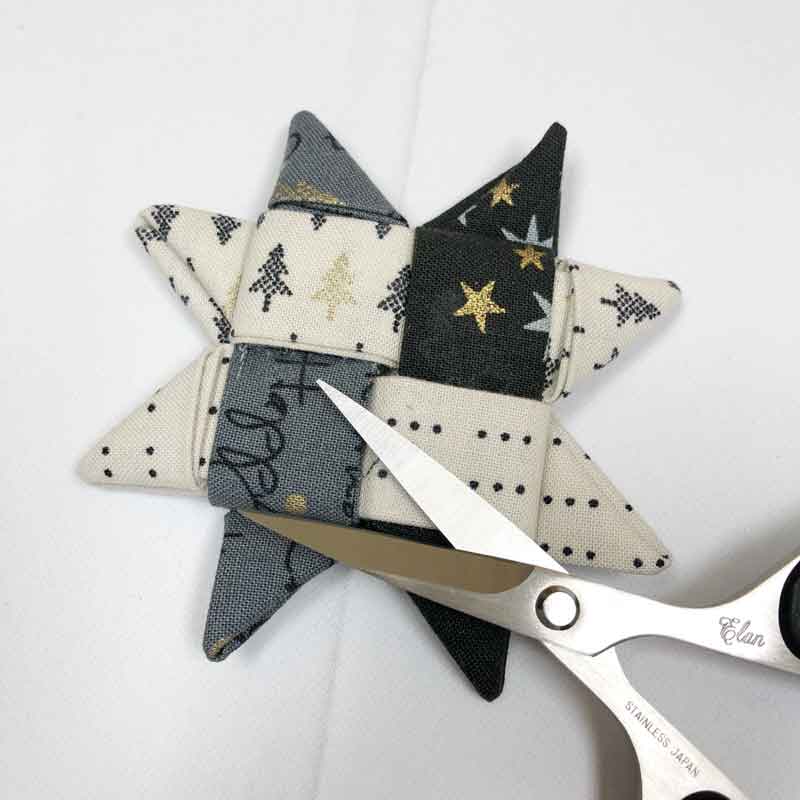
Now carefully - carefully! - trim the eight tails. I found that folding the star along the center helped a bit, as did pulling on the tail a bit so that it went back under the folded edge after it was cut.
Repeat - carefully. (You could ask me why I repeat this but I'm guessing you've already figured out the reason.)
Baste-it glue - this is optional. I like glue and I like knowing that if one of the star points gets pulled, the star isn't going to come apart. So I slipped the point of the glue bottle under the edge after cutting the tail and put a couple drops of glue. Then I pressed the star to set the glue.
The glue is also useful if you accidentally cut through a strip.
Et voila. Scandi Stars!
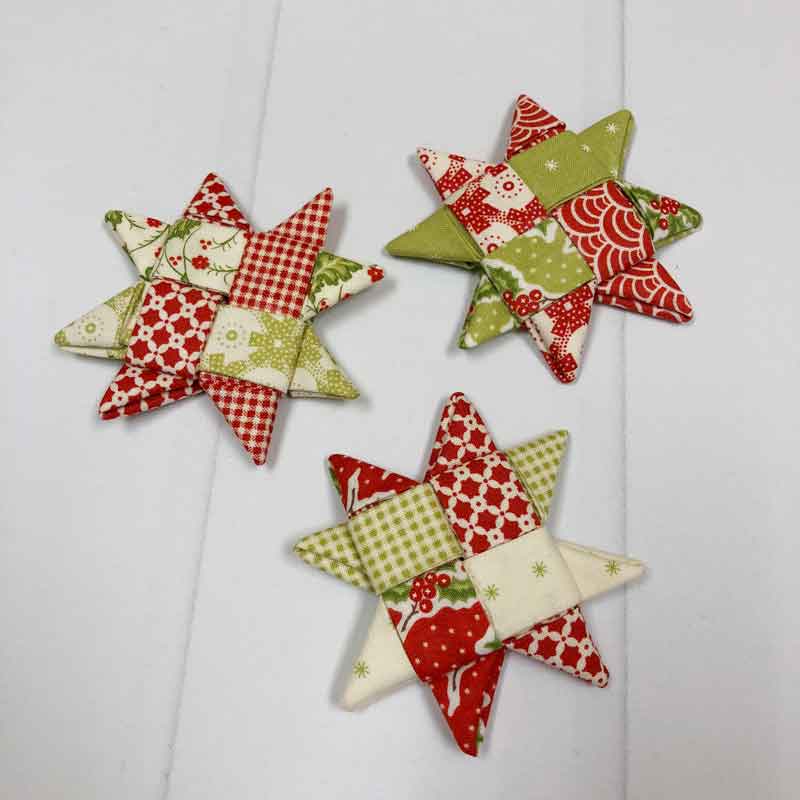
When the stars are complete, a strand of perle cotton or embroidery floss can be threaded through to make a string-loop so the star can be hung on a tree or added to a gift as a little tie-on. Where to put the loop? Between the two star points or in a corner - both work.
Sizes. I did experiment with wider strips for different size stars and here's what I learned-know:
- Wider strips work nicely, it just means more length is needed. How much? That's a guess because if there is a mathematical calculation for that, I don't know what it is. (And I'm too lazy to figure it out.)
- The width of a cut strip is the approximate finished size of the star. e.g., a 3" cut strip yields a star that's about 3" across.
- I experimented with strips cut at 5" x 21" width of a fat quarter. I think 16" strips would have been enough... so 5-1/2" or 6" by the width of a fat quarter might be worth trying.
- The 5" star - 5" strips - is not floppy, it could be used as an ornament or package tie-on. Depending on the fabric, I think a 6" star - 6" wide-cut strips - would also work.
I would like to share the two best blog-tutorials I found on making these stars. They are:
- Scandinavian Fabric Stars by Gillian of Crafting a Rainbow
- Fabric Star Ornament Tutorial by Betz White
Happy Friday!
Posted in:
Comments