Welcome to Moda Fabrics!
Christmas Village...
Christmas Village...
Published:
Jul 14 2017 - 04:00
You know I love house blocks, right? Complicated or simple... especially simple.

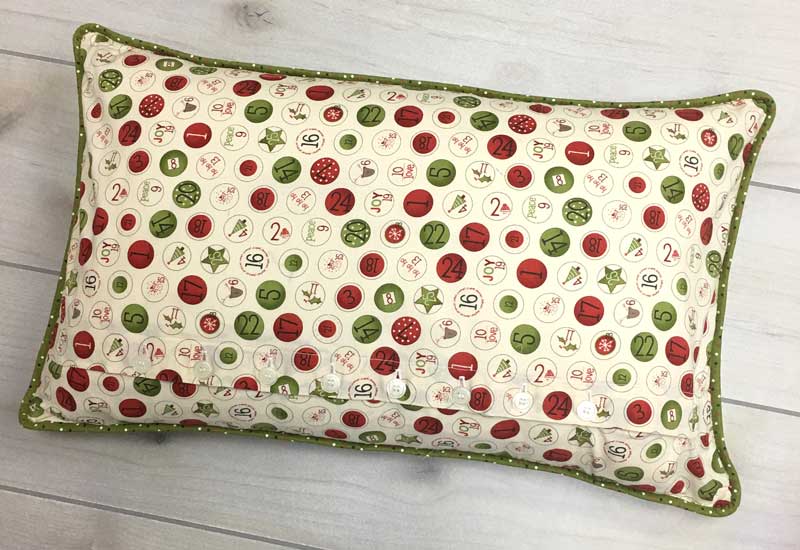
I've called this pillow Township. I made it a few years ago using one of my most favorite collections, Countdown to Christmas by Sweetwater. I had planned to make an updated version... actually two.
One top is pieced and about half-quilted - Hometown Christmas by Sweetwater - the second top is still not officially a "top"... meaning, I have five house blocks made - Petite Maisons de Noel by French General - and that's as far as I got. (I'll share as soon as they're done.)
You know this is Christmas in July, right?
And since Christmas is about gifts, presents, sharing... we're sharing the instructions for Township.
Click Here for the Township Instructions.
I also want to share the finishing for this pillow as it's a technique that not everyone has seen. I first ran across it maybe fifteen years ago and I believe the idea originated with Lynette Jensen of Thimbleberries fame. Since she had many, many cool ideas and the pillow I saw was one of hers, that's who I am crediting.
Binding. Seriously, that's all it is. The front and back of the pillow are layered with wrong sides together - right sides out - and bound like a quilt. If you cut your binding strips at 2-1/2", you're good to go with a 1/4" seam allowance. Since I usually cut a 2" binding, I cut my strips at 2-1/4" to allow for that extra layer of fabric.
I finished the back with an overlap and buttons.
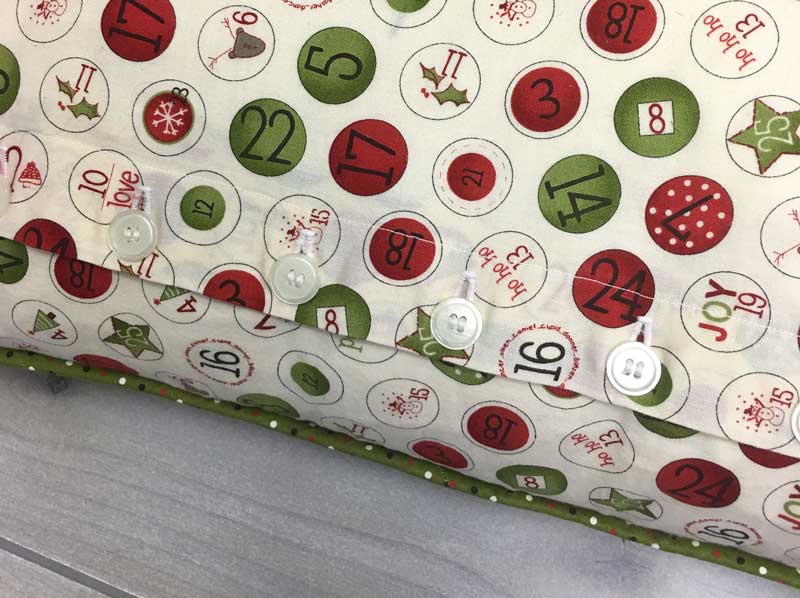
Why yes, thank you, I attach those buttons by machine. If my sewing machine came with a foot designed for doing that, I know it's because I'm supposed to do it that way. (Which doesn't explain why it takes me six months to replace a single button that came off a shirt...)
Make the pillow front and quilt it using a thin cotton batting and a muslin or solid backing. Trim to size. Make the backing using a simple overlap, or a button or zipper closure. Trim the backing to the same size as the pillow top. Layer the two pieces with wrong sides together - pin the layers together on all four sides. Stitch 1/4" around the four sides to secure the layers.
Optional ~ Curve the corners.
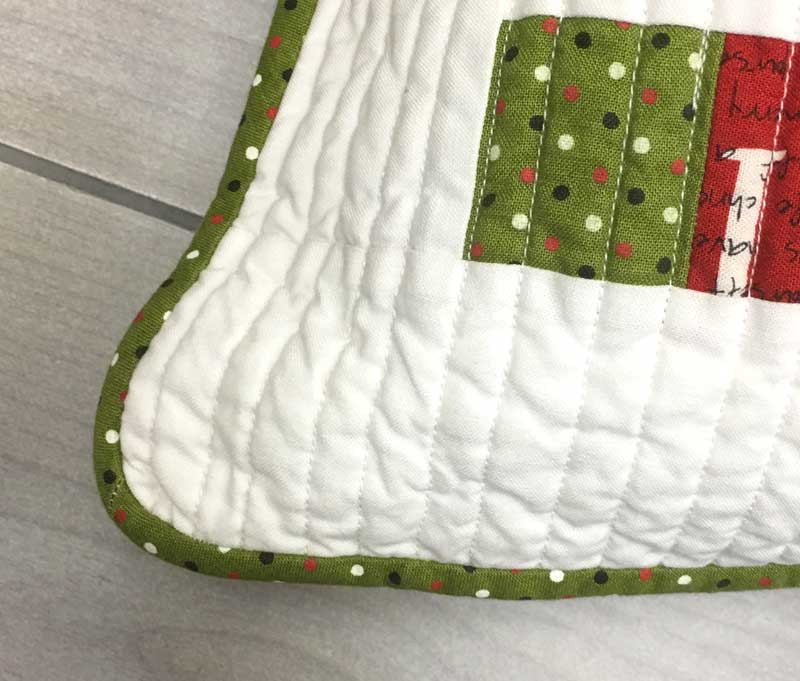
I think someone once made a template or tool for curving corners but I just use something round - a plate for a big curve, a cup or glass for a smaller curve. I suppose you could use a compass but really, just grab a pen-chalk marker and something round. (Insert winking emoji here.)

Attach the binding in your preferred method. I like hand-stitching it so I attach it to the front and bring it to the back. For the insert, fiber-fill works but if you're convenient to a store, I like the FJÄDRAR pillow forms from Ikea - 16" x 26" down-filled. (I particularly enjoy that the insert comes in a smallish, round vacuum-sealed bag. I'm easily amused that way.) Stuff pillow or insert form.
C'est voila! A new addition to your holiday decorating - or a lovely gift. Just in case you forgot...
Click Here for the Township Pattern-Instructions.
It goes without saying that a Halloween or Valentine village would also work. As would a patriotic color scheme or something very scrappy. Or maybe just a really happy village for your kids or grands. So get busy building!
And I hope you have a very happy Friday!
Posted in:
Comments