Welcome to Moda Fabrics!
Cake Mix 101
Cake Mix 101
Published:
Aug 21 2018 - 05:00
After almost two years of sewing with - and playing with - the Cake Mix Recipe papers, I've managed to learn a few things about what worked and what didn't. (I've also learned that I keep learning new things about them!)
So today I'm going to share some of what I've learned.
What is a Cake Mix? It's a triangle paper designed to make specific blocks - including some of those shown on the front cover of each Recipe pad. It's that simple. Depending on the Recipe, one stitched recipe card will make 1/2 a block, 1 complete block or 2 blocks. The Cake Mixes are not patterns but instructions for the quilts we've made can be found here - Cake Mix.

This is Cake Mix 5. For this recipe, each stitched recipe card will make 2 blocks that finish at 7". The blocks can be matching or positive-negative versions of Blocks 1 through 3. Or it can be one each of those, or one each of Block 4 . You get to decide. When you stitch more than one card, pieces and parts can be mixed for scrappy blocks.
The cover of each Recipe specifies the size of the finished pieces, and how many pieces you'd have if you stitched all 44 recipe cards.
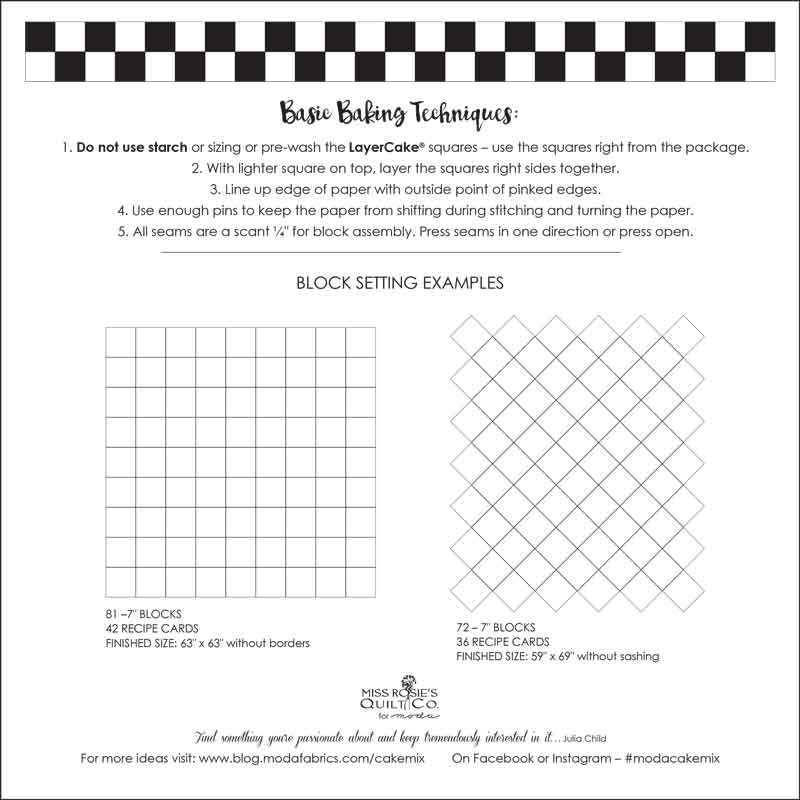
This is the inside of the front cover for Recipe 5. The Block Setting Examples are as much "pattern" as is included - make 81 blocks in a straight setting of 9 rows of 9 blocks each makes a quilt 63" x 63" square.
The Basic Baking Techniques are what you need to know for stitching.
Starching. Starching or sizing fabric shrinks it. With Layer Cakes and Charm Squares, the pre-cut squares can shrink as much as a 1/4" in width. Some of the recipe cards will still fit easily on a 9-3/4" x 10" square, others won't. (The background square is larger because it was cut from yardage.)
So yes, we wrote that you shouldn't starch, but we know you can. On some of the Recipes but not all of them. If you are a dedicated starcher, measure the grid on the card to see how much fabric is needed.
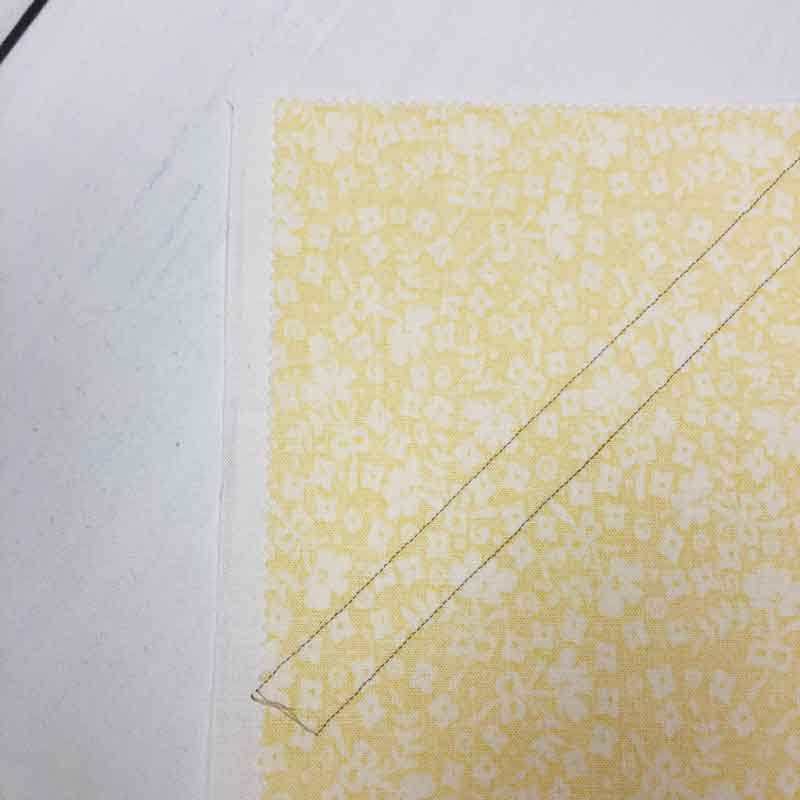
Layer Lighter Square on Top. That allows you to press the seam toward the darker fabric with the paper still attached. The reason for leaving the paper on during pressing is that it makes it very hard to distort the HTSs during pressing.
Line up the edge of the paper with the outside point of pinked edges. The paper measures 10" x 10", the same size as a Layer Cake square.
Use enough pins... Some cards only need three or four pins, others are best with eight or nine. The paper and two layers or fabric are going to be turned around multiple times during stitching. But as soon as sections have one side of the line stitched, you can start removing some pins to minimize scratching. I've heard from a few people that appliqué pins work nicely.
Glue sticks and glue basting? I wouldn't recommend it. Because of all the turning back-and-forth while stitching, the three layers need to be kept aligned so the two fabrics would need to get glue to keep them together, then more glue used to adhere the paper to the top of the layered squares. Pins are easier - and they work.
All seams are a scant 1/4" for block assembly. A scant 1/4"? See here.
Stitch length. While stitching the cards, set the stitch length a bit shorter than normal - more stitches. The shorter stitch length helps perforate the paper, making it easier to remove.
TIP: Thread. This isn't on the paper but I'm always asked - use your regular sewing thread. It's probably a 50wt. so use that. I've used various types of triangle paper for many (many) years and I've never had thread break while the paper is being removed.

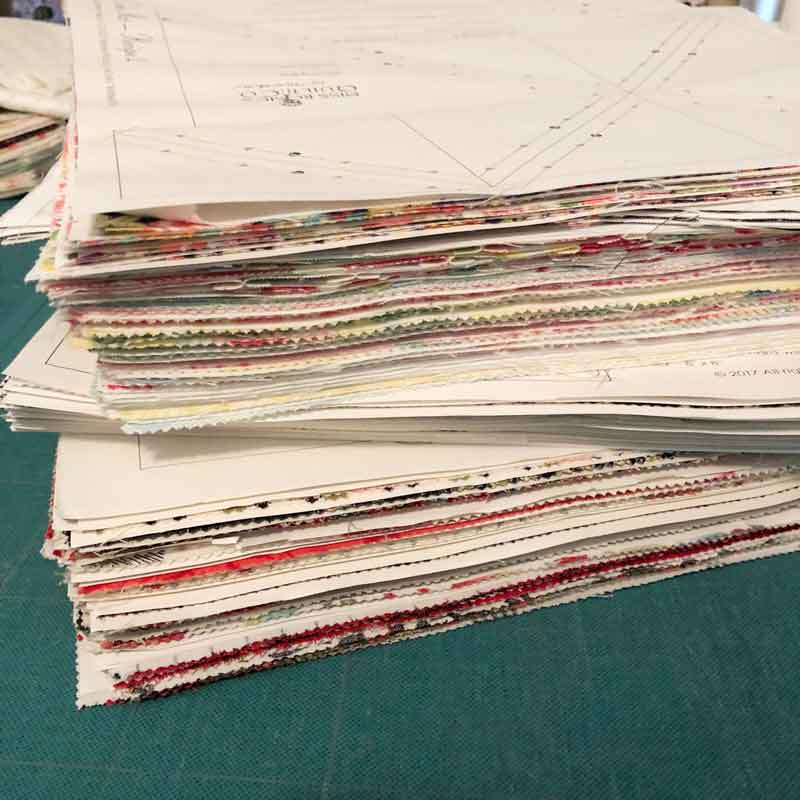
This is what the Recipe card looks like for Cake Mix 5. This card make 4 matching half-triangle squares that finish at 3-1/2" and 4 four-patches that finish at the same size. That rectangle on the bottom - it yields 8 pieced segments that are joined to make the four-patches.
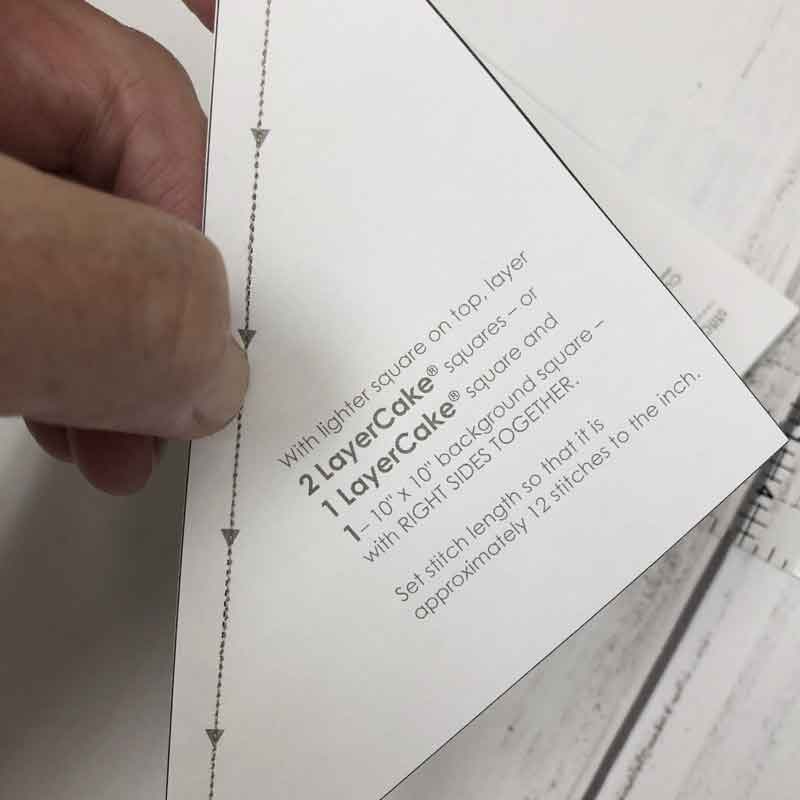
Stitching on the line. Stitch on the dotted line. Use your presser-foot as a guide only if it is putting your needle exactly on the dotted stitching line. Watching the needle works but I've found that if I aim for a point on the line about 1" in front of the needle, that keeps me on target.
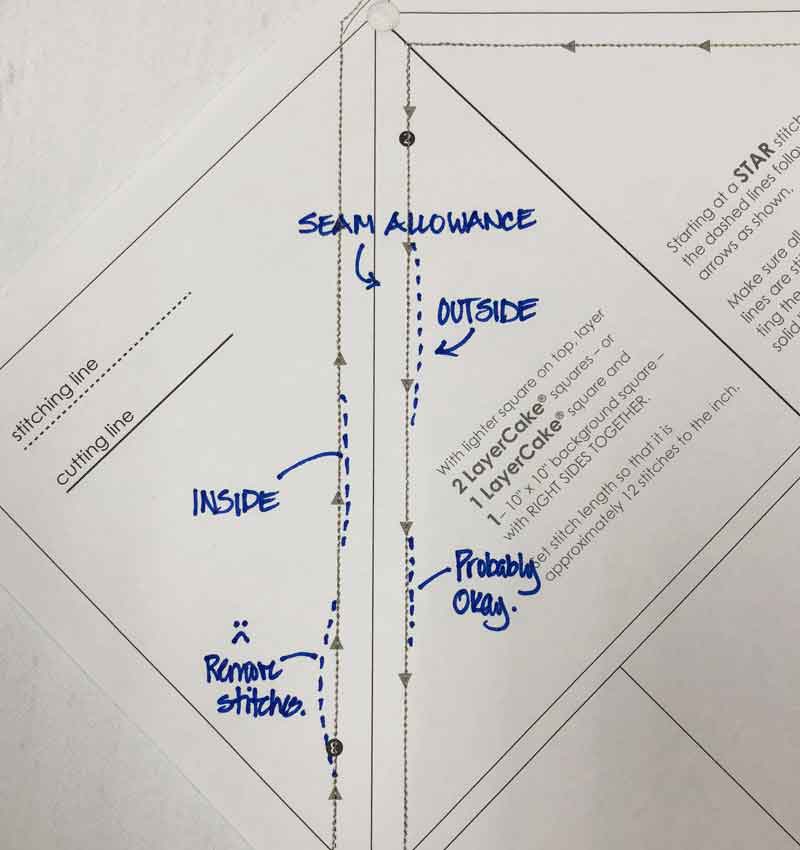
Is it a problem if you veer off the stitching line a little bit? Maybe. If you're outside the line - inside the triangle - pick up the presser-foot and needle, go back to where it veered off and re-stitch that portion. Do you need to remove the stitches? If the stitching line is within a thread's width of the line... I would probably just move on. But if it's a couple of thread widths or it's a smaller HTS, I would remove the stitches before pressing.
Is the veer inside the seam allowance? Pick up the presser-foot and needle, go back to where it veered off and re-stitch that portion. And do not worry about removing the stitches.
Starting at the Star. Cake Mix Recipe 5 has two starting and stopping points. Others can be stitched in one continuous line so starting at the star and following the arrows and numbers makes stitching the card easier.
TIP: Chain-piecing. For those recipe cards with two distinct portions - as for Recipe 5 shown above - I like to stitch the HTS portion of a layered-card first in both directions. Then I feed in the next layered-card in for the HTSs. I will stitch a few, a dozen or all of them, then feed through the bottom four-patch portion in the same way. It isn't a better method, it's just what works for me.
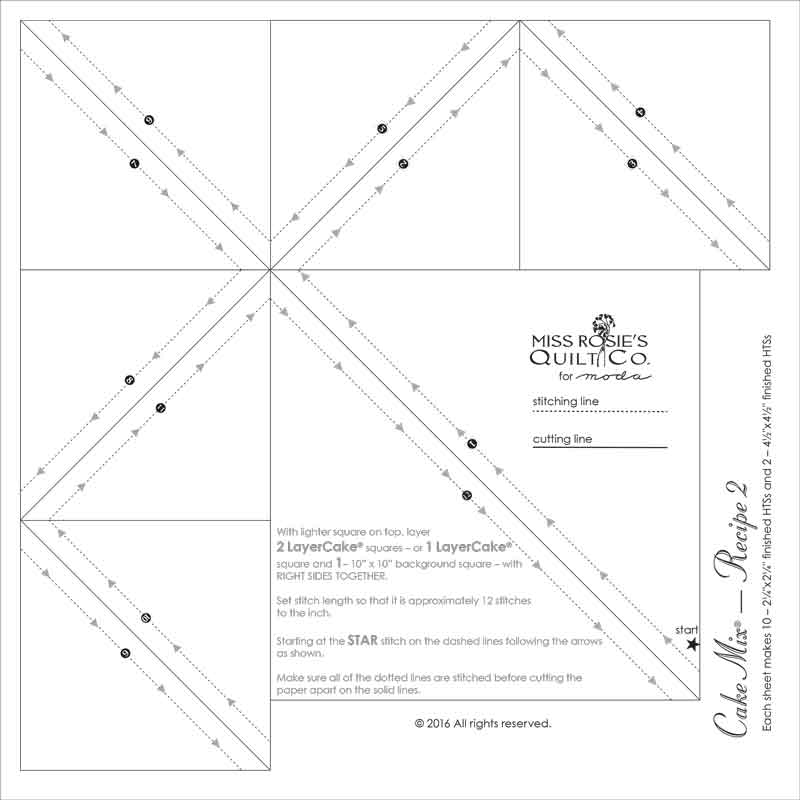
This is Recipe 2 - starting at the star and following the numbers allows for this card to be stitched in one twist-and-turn pass under the needle.
But if you're a rebel and simply must start elsewhere, or stitch against the arrows, go for it. The card will still work. (Ask me how I know.)
Before you cut... The most important thing to do before you start cutting the cards apart is to check the backside of each layered-card.
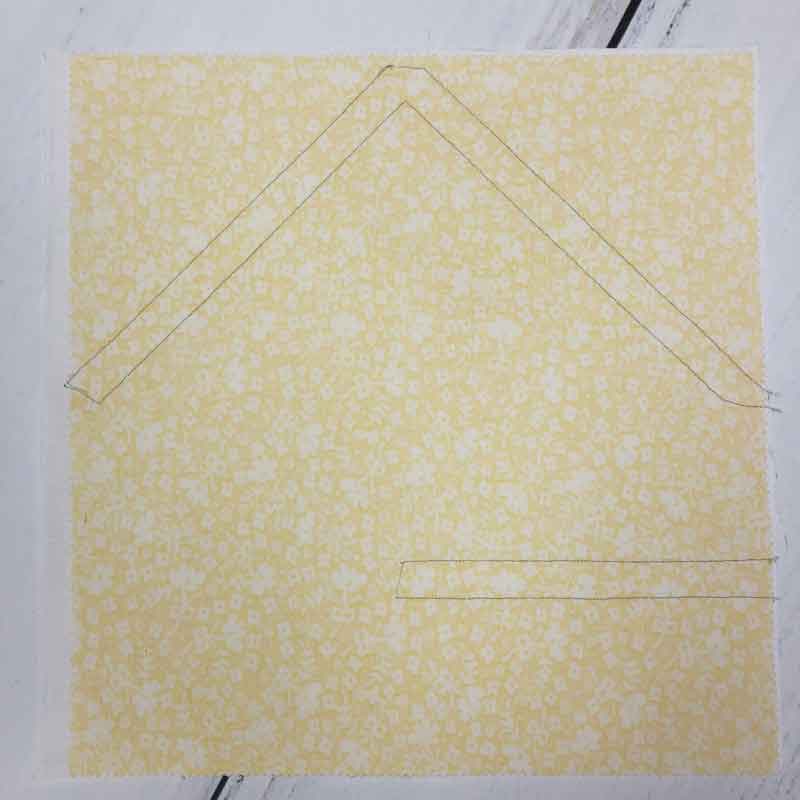
Before cutting, make sure there are two parallel stitching lines. If there is just a single line, you've missed something. (P.S. I just realized this is a Recipe 12 card, not Recipe 5. Pretend that the straight line of stitching on the bottom goes all the way across.)
Rulers and rotary cutters. Use your favorites. The key to cutting is that the edge of the ruler needs to be exactly on top of the cutting line. If you can see the line next to the ruler - or under the edge - the finished piece will be a skosh too big or small.
While the lines for the squares and outside edges must be cut accurately, the cutting line in the seam allowance is less important. Close enough works.
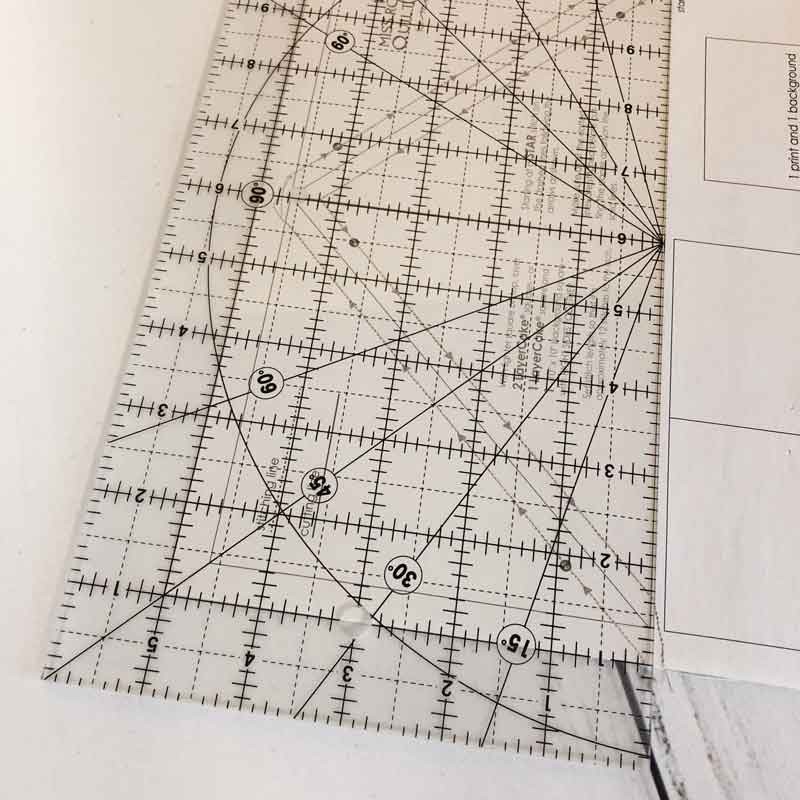
Also use a ruler that is wide enough that other lines on the card can be used as a reference to keep the cutting edge straight. The ruler here has a horizontal line on a cutting line, and the vertical lines on the left are also aligned. (The angle of the photograph makes it look like the edge of the ruler is over the line. I had to do that to eliminate glare.)
Pressing. Do not press with steam - except if you have prepped your squares with starch or sizing.
Removing the paper. Place your thumbnail right on the seam in the middle of the piece. Tear the paper up and away - it will usually come off in one piece.
Fold the pressed triangle back under the seam and take the 90-degree corner of the triangle in your other hand. (The one holding the camera for a picture.) . Then pull the paper up and away, tearing it at the seam line. Then use your nail to sweep back removing the paper in the seam allowance. It works almost every single time - especially after you've gotten a little practice.
(True story, I've used triangle paper for over twenty years and only learned this trick from Tammy about two years ago. Best Cake Mix tip to date.)
Trim the corners. It must be done. All at one time or in groups as you're making blocks.
Making blocks. This is where you're the designer! Will the block be made with just two fabrics? Or should pieces and fabrics be mixed up for a scrappy block? Or what about just laying out the pieces in a random fashion? That's entirely up to you.
Versatility. There are a lot of patterns that require 2" finished or 4" finished HTSs. Use the Cake Mixes to make the HTSs.
A few last things to mention...
- Rotary cutting blades. Ask a dozen quilters if paper dulls the blades and you'll get a dozen different answers - good answers. My experience is that after cutting all the recipe cards apart for a quilt, I like changing the blade. I don't think it's that the blade has been dulled by the paper so much as it's usually a lot of cutting!
- Ink transfer to fabric. The paper is printed using a heat-process that makes the ink permanent. Even if you've slathered your hands with cream, the ink won't smear. With sixteen projects made, I have never had any transfer of ink to fabric and I press with steam, use hand-cream, have spilled coffee onto my papers and fabric, etc.
- Paper quality. I love the Cake Mix paper. (Thank you Bob!) It holds up beautifully during pinning and stitching, but still tears away easily. What's not to love?
- Making quilts bigger? That's easily done - just add more Layer Cake squares and recipe cards.
There are a few more finished quilt Recipes-instructions being added in the coming days, and a few more to complete. And there are already new quilts in the works.
And I keep getting ideas on what to make with them.
I did say "playing", didn't I?
Happy Tuesday!
Posted in:
Comments