Welcome to Moda Fabrics!
Christmas in July ~ Throwing in the towel...
Christmas in July ~ Throwing in the towel...
Published:
Jul 24 2015 - 03:30
I'm not quitting! I'm referring to Toweling.
I knew that Moda made toweling and I knew in general terms what it was - 18" wide, sold on a roll, 100% cotton... and that was about it. It seems that I sort of missed the boat there.
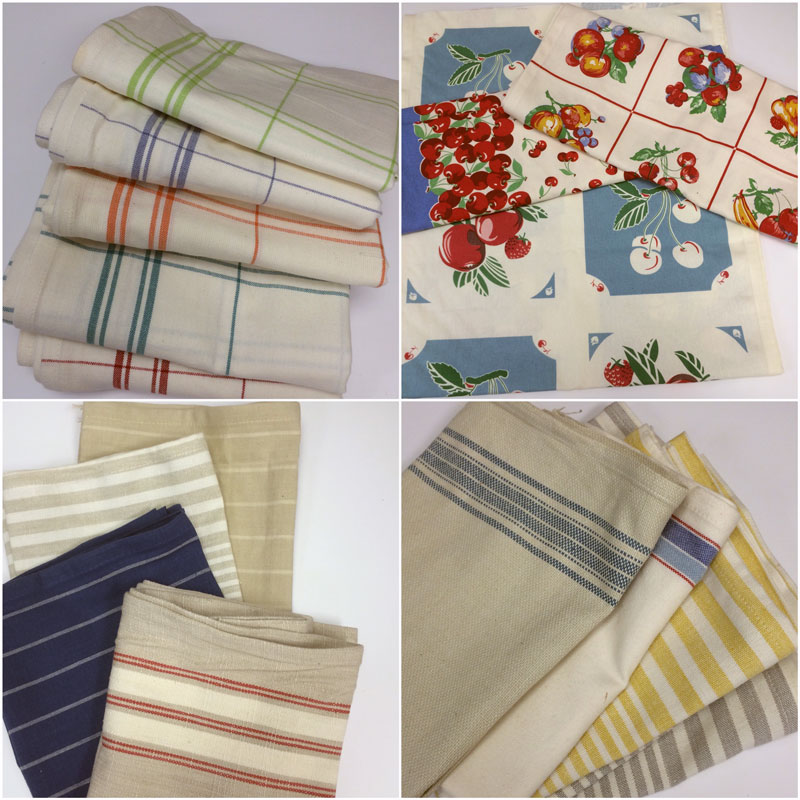
Apparently we have quite a bit of variety.
I don't recall ever seeing a display like this in a quilt shop...
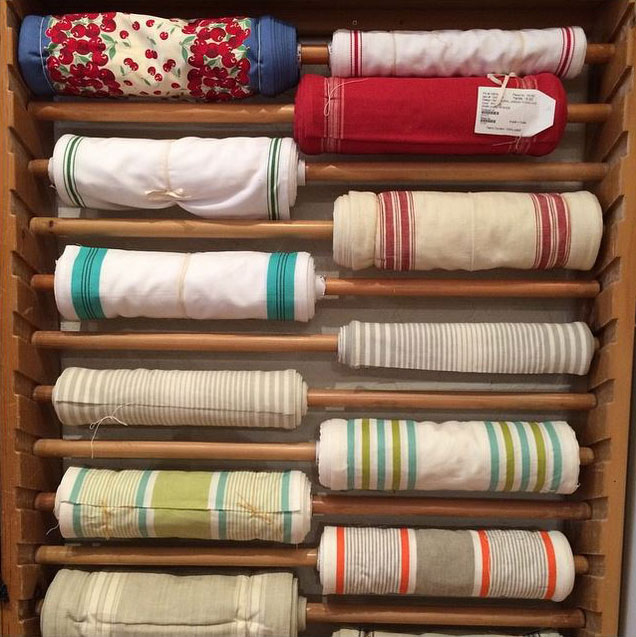
If you've been to Sarah's Fabrics in Lawrence, Kansas, you've probably seen this wonderful display. (The photo is from @sarahsfabrics on Instagram.)
I also wasn't sure what you could make other than well... towels. Having worked at a well-known kitchen store for several years, I had lots and lots of kitchen towels so I admit to being a little at a loss for what else to make.
Then I was presented with two challenges. First - the sewists in the office have been tasked with making something with our toweling. Second - think of some relatively fast, simple and hopefully cute ideas of things to make for gifts. Being a practical sort of girl who likes to be efficient when possible... I wondered if I could combine the two. Make a gift item with toweling.
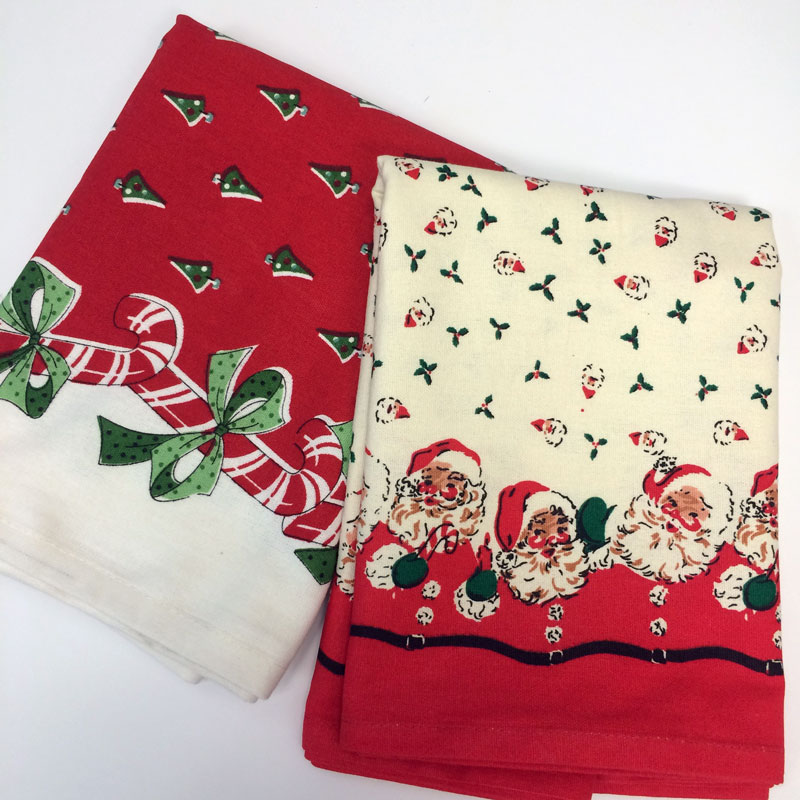
I started by stitching the ends for a pair of towels. I trimmed the lengths to 28" long so they would finish at about 26" long. (I had cut generous 3/4 yard pieces of both - I'd been told that 3/4 yard is the generally-accepted length to get to make a kitchen towel.)
I used two different Christmas themed prints because they were cute and I knew I could use them over the holidays.
As I stitched the towels - that took all of 5 minutes - I started thinking about how else the towels could be used. (I pressed the cut edge up 1" and then turned under the edge as I stitched it. Nope, I didn't pin.) Big napkins - squarish, a bit more rectangular or kitchen-towel sized! Whether at a buffet-style party or a summer BBQ, big cloth napkins are much appreciated. They'll wash quickly and when they get a little too worn for company, they'll still make nice kitchen towels.
One thing to mention - the toweling does like to fray if it hasn't been washed. Pre-washing the fabric will "tighten" up the fibers and lessen that but factor that in when buying yardage. Also consider that when cutting lengths - how big would you like the finished towel or napkin to be after it's been washed?
So... looking at those long narrow lengths, I got another idea.
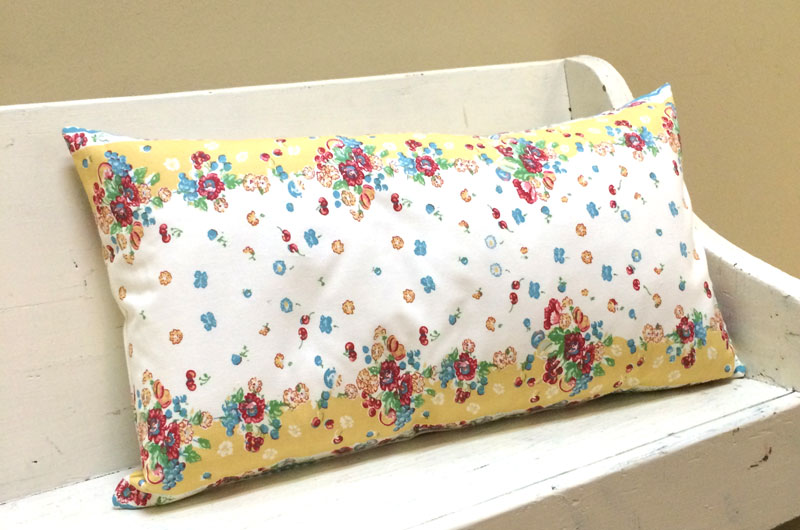
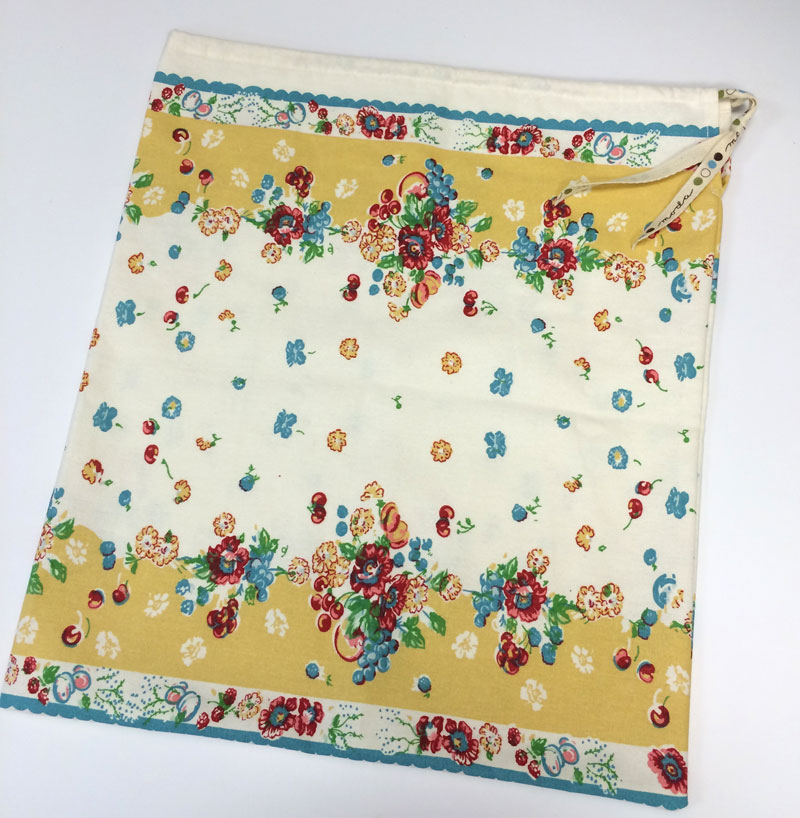
A lumbar pillow - Retro-style. (This print is Granny's Garden 920-120. I keep being asked.)
Using a 15 1/2" x 27" pillow from Ikea, I made a cover. This took less than an hour - it would have been faster but I added a zipper. I measured the width of fabric between the two side seams to decide if I needed to remove the stitches on one side, or both. When it measured 16 1/2" between the seams, I just cut them off. (I bumped my rotary ruler tightly against the seam and cut.) Having a pillow cover fit snugly is a good thing. I put the zipper in the bottom, sewed the remaining three sides using a 1/2" seam allowance and it was done!
But I still had a piece leftover - I'd been thinking "apron" so I'd cut a bigger piece of this towel. FYI - aprons are apparently another popular thing to make with toweling. I wasn't sure how much I'd need since... uh, I'd never made an apron. As you can probably guess from the picture above... I still haven't.
Back to my leftover piece...
Voila! A very cute and simple little drawstring bag using the hem as the casing. As with the pillow, I simply cut off the hem on one side and stitched.
Before stitching up the side, I removed about 3" of stitching on both ends of the hem. I turned under the side edges twice and stitched it down about 1/4" away. Then I re-stitched the two hemmed ends to finish the casing. The side was stitched with a 1/2" seam allowance up to where the edges had been turned - then back-stitched.
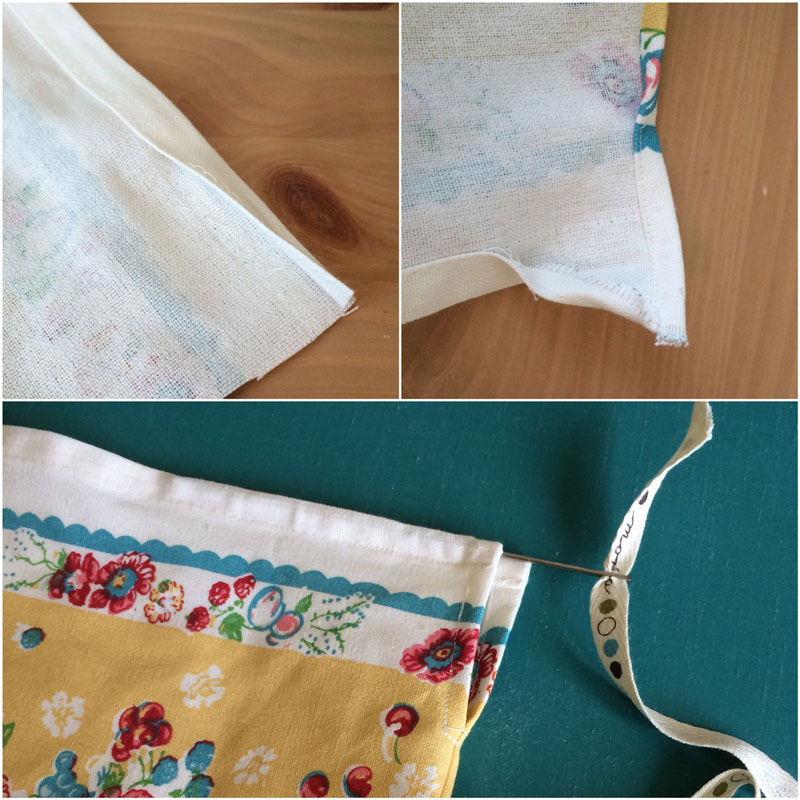
The opening was top-stitched to make it look a bit neater - and to secure the bottom of the opening. Do not stitch across the hem - that's the opening for the casing. Using a bodkin - can you believe I have one? - I inserted a length of narrow Moda twill tape. I cut it twice the "width" of the bag plus 10" or so. That left enough to open the bag completely, have a little extra room, knot the ends and trim them to a nice little tail.
I also made a little stocking using some red French General toweling.

It measures 5" wide at the top and 12 1/2" long. Two layers of toweling - right-sides-together or wrong-sides-together - with the top of the stocking at the hemmed edge. The cut-off hem was trimmed to the stitching and used for the hang-loop. Over-casting or serging the seam is recommended as the toweling does like to fray. (This took about 30 minutes to make.)
Yes, I made a pattern for my stocking - Moda Toweling Stocking Template.
Then the fun really started.
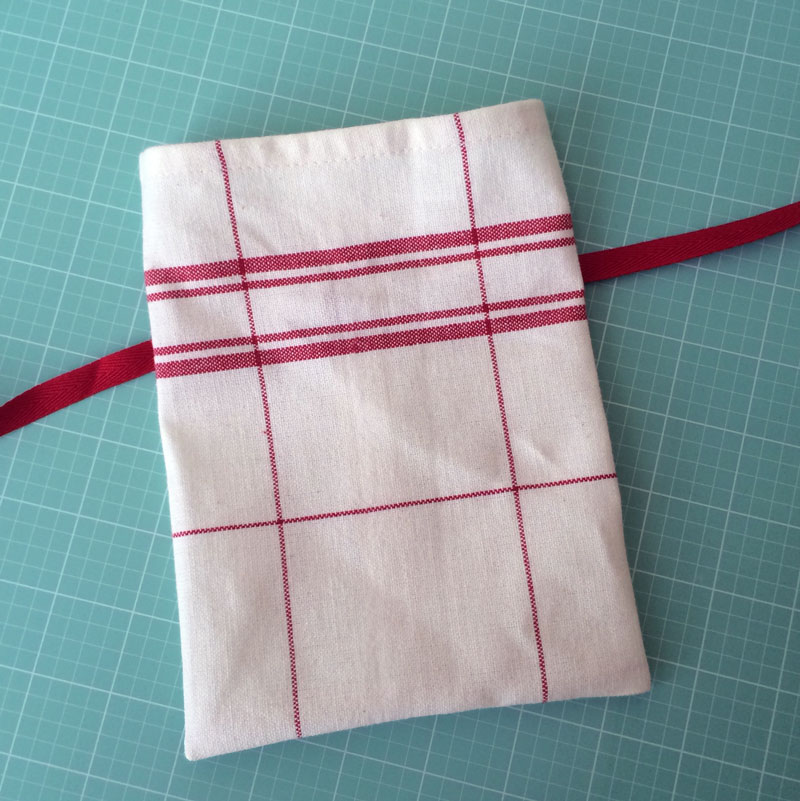
I cut pieces of this toweling 12" long. I folded the toweling in half - hem-to-hem. I cut along the fold to make two pieces 12" wide by approximately 8 1/2" high. I also cut an 18" length of ribbon - a 1/2" wide red twill tape I had on hand.
Fold the ribbon in half and put the fold in the seam allowance a few inches from the top - I chose to center the ribbon between the two stripes. Sew a 1/2" seam allowance - center the seam and press it open. Optional - stitch the seam allowance down to the hemmed edge at the top. Stitch a 1/2" seam allowance across the bottom of the bag.
Now... the bag can be finished as in the picture above. Or the corners of the bags can be "boxed".
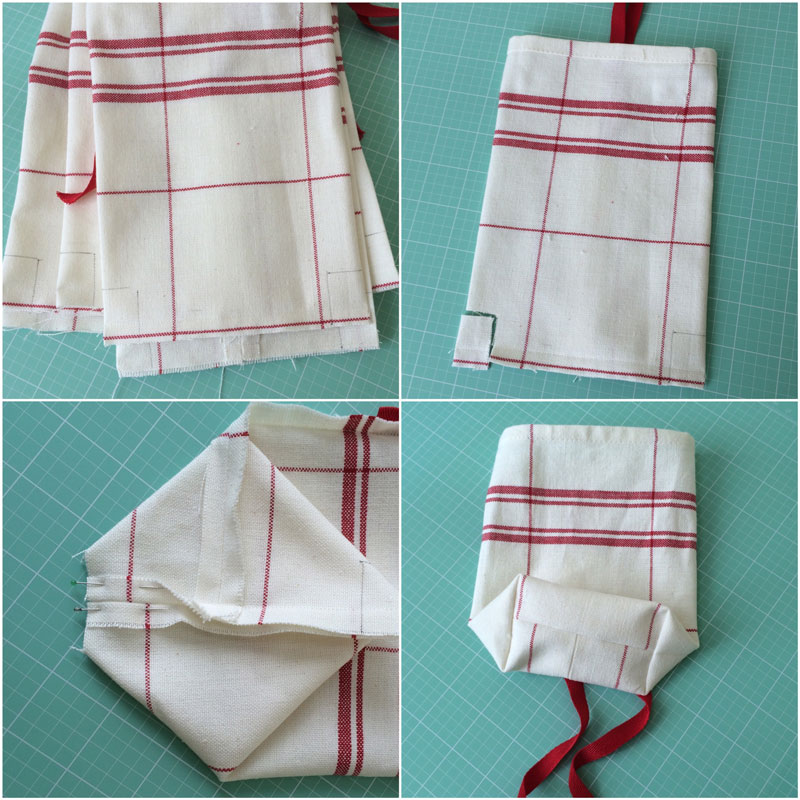
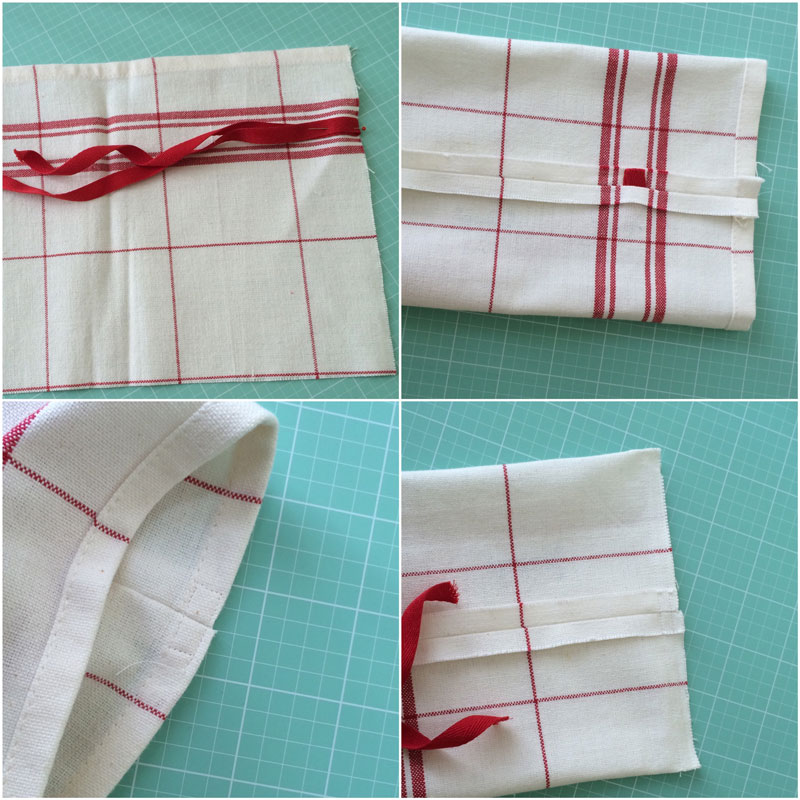
Mark the "cut-outs" on the bag - 3/4" from the sides and 1 1/4" from the bottom - to account for the 1/2" seam allowance. Cut on the lines to remove the corner. Fold at the 90-degree corners and match the cut edges as shown in the lower-left picture. Stitch a 1/4" to 3/8" seam. Turn the bag right side out and it's done.
One yard of toweling and 4 1/2 yards of ribbon will make 6 bags. Uh... I had 2 yards of toweling.
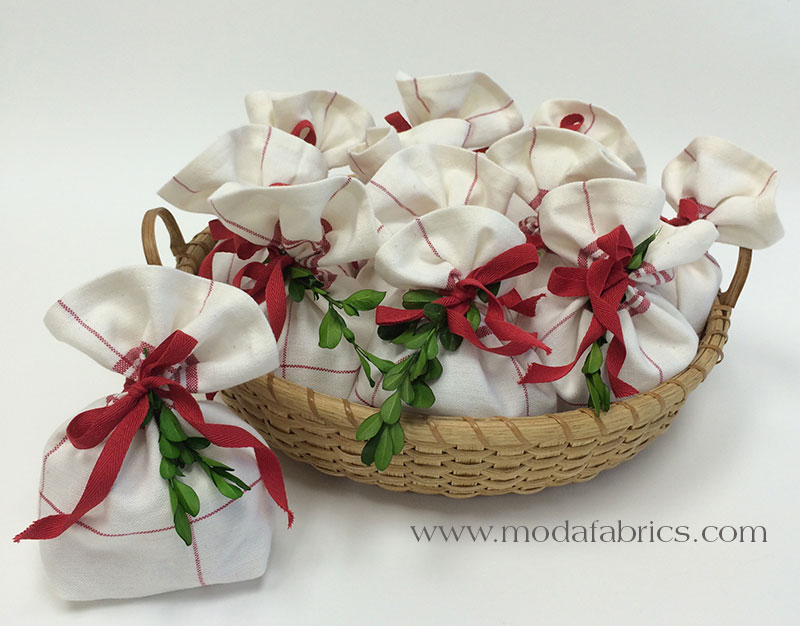
Twelve bags took a little less than two hours to make. If you're wondering why I keep including the time, it's only so you have some idea about how quickly these can go together.
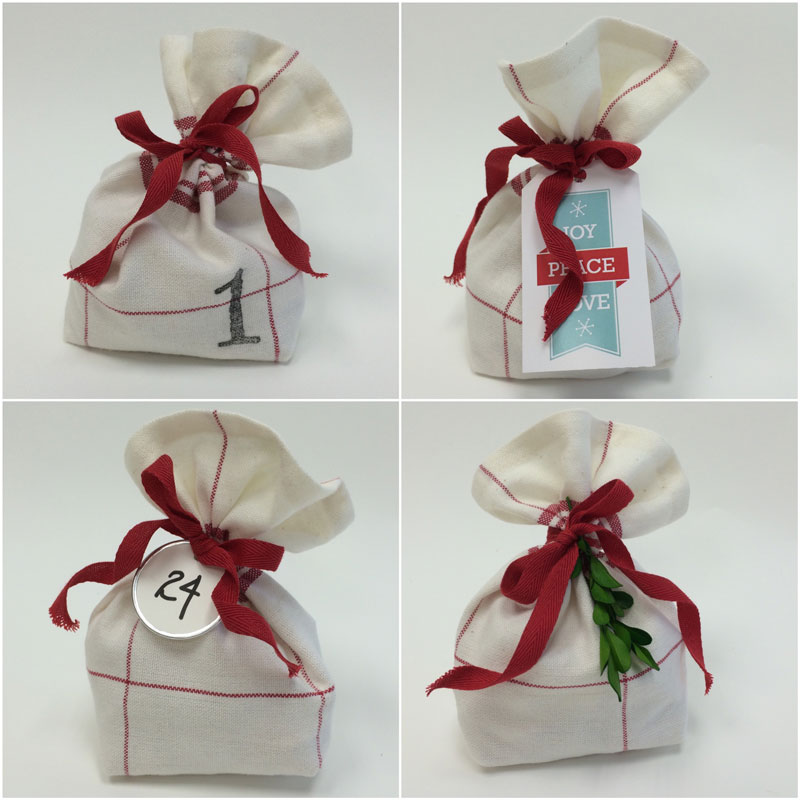
I did experiment with rubber-stamping a number onto the toweling - it worked very nicely, thank you. Twenty-four bags would make a nice advent calendar - as would 24 tags from the office supply store. These would also make a nice presentation for a quick gift for guests - either with a tag, a little sprig of greenery, some small tie-on or ornament. The tags are easily made with cardstock and a printable design - an online search for "free printable Christmas/holiday tag" and there are all kinds of terrific options. The same goes for "free advent tags printable". (Pinterest is also a good starting point.)
If you're unfamiliar with the toweling, it can be found at your local quilt shop or online. It does vary a little in width but most are between 16" and 18". Instead of selvages, the toweling has two hemmed edges. Depending on the design and fiber content, the toweling generally costs between $5.00 and $7.00 a yard.
I hope you have a wonderful weekend - I might just go see what else I can think of to make with toweling.
Comments